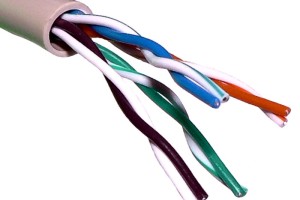
Cat5 cabling installation
Despite the fact that many people find wireless networks to be a more convenient way to access the internet, some people prefer to have their own, fully private network. In order to obtain such a network, a person is able to install Cat5 cabling to grant any devices connected to the system internet access. These networks cannot be accessed by outside sources and are therefore much more secure. This article contains information regarding the steps that need to be followed in order to install such cabling.
Step 1: Planning
The first step that needs to be taken is determining how best to install the Cat5 cables. In order to figure out the best method of installation, a person has to figure out exactly which rooms he or she wants to have internet access, as well as the number of ports that need to be in each room. A person needs to assess how many devices he or she will have in each room and make that decision. The network speed that is desired also needs to be figured out. If a person is planning on using the internet to play games or exchange large volumes of information, he or she will also need a gigabit switch in order to ensure that he or she is able to get a fast enough connection.
Step 2: Gathering Tools
The second step is to gather all of the necessary tools. The tools that are needed includes a drill, a hole saw, fish tape or extremely strong string, pencil, and ruler. A stud finder is also necessary in order to ensure that the wall plates will be mounted and still be appropriately stable. The last tool that is needed is a laptop that will be able to be connected to each port to make sure that it has been installed correctly and is working.
Step 3: Mounting
Once this step has been completed, the wall plates need to be mounted near studs in the wall. The studs can be located using the stud finder. Then, an appropriately sized hole needs to be cut into the wall for the gang box to be inserted. This step needs to be followed for each location that needs internet access.
Step 4: Running the Cables
Holes need to be drilled through the top wall plates so that the cables are able to reach the gang box. Once the holes have been drilled, the cables can be run from one location to the other and then cut down to the appropriate length.
Step 5: Connecting the Wires
After all of the cables have been run, they need to be plugged into the gang box. This process is fairly simple because most boxes are adequately labeled to ensure that the job is correctly completed.
Step 6: Testing
The last step is to take the newly connected cables and attach them to a laptop or other device that is able to use the internet. This is important because it will allow the person installing the wires to ensure that he or she has done it right.