How to Make a CAT6 Cable
From a technological standpoint, for most businesses, CAT5 cabling is just no longer cutting it. Companies need more bandwidth and better reliability. The current market just can’t justify crosstalk and return loss making a mess of a system anymore, now that there are other options available. CAT6 cable is improving transmission performance and reducing near end cross talk (NEXT) with every properly installed system. It is definitely thought of as the choice for new installations.
Perhaps you have a previously installed CAT5 or CAT5e system, and are contemplating an upgrade. Perhaps you want to see what all the fuss is about regarding CAT6 cabling. This article should help you to build a functioning CAT6 cable, which you can use as you please. However, please realize that there is a high margin of error involved, and it is highly recommended to hire a professional network cabling technician to complete any long term installations you may require.
To make a CAT6 cable ready for networking, you will need the following equipment: a CAT6 cable, 2 pairs of pliers, regular scissors, a pen, a crimping tool, and RJ45 CAT6 connectors. To begin, cut the jacket off the cable on one end, about a two inch section. Be careful not to cut through any of the wires! There will most likely be a small string hanging out, cut this off with the regular scissors. Also locate the thin plastic piece that holds the wires together inside of the casing — this too will need to be cut with regular scissors.
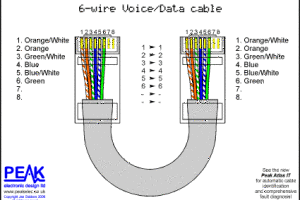
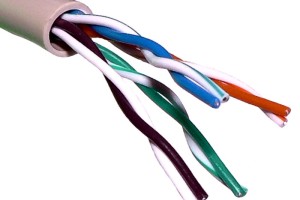
You should now have four wires exposed. Untwist them and lay them with orange on the left, brown on the right, with blue and green staying in the middle. Each wire consists of two wires twisted together — the twisted copper pair — which now must be untwisted. This will leave you with eight strands, place them in this order from left to right: white with orange, solid orange, white with green, solid blue, white with blue, solid green, white with brown, solid brown.
Once the wires are in order, they must be straightened. Using a regular pen, hold it under the wires and run them on top of it, over and over, until they are as straight as possible. Using your regular scissors, cut the exposed, and now straight, wires at an angle. Starting at the brown wire, cut at an upward angle through all eight wires. This will help you to attach the CAT6 piece of the connector. This is painstaking, and you will need to slide each wire individually into the plastic piece. Try not to get frustrated, this is definitely hard to do. Use one pair of pliers to hold the plastic piece, and the other to pull each wire all the way through the piece, to the base of where the wires meet the jacket.
Once all the wires have been threaded, use the regular scissors to cut off all the additional wire tails. At this point, double check the color order of your wires. Now, attach your RJ45 connector and slide it over the plastic piece. Make sure it fits snugly and completely over it. Use your crimping tool to crimp the connector onto the cable. This end of your cable should now look ready to use. Repeat this process on the other end of the cable, so your two ends are identical. Be sure to use a network tester to ensure the functionality of your newly made cable before use.